
A perfect three-day stretch for throwing all-American favorites like burgers, hot dogs and steaks on the grill, Memorial Day weekend is also an ideal time for grill up dishes that hail from outside the U.S. Like, say, pizza.
A graduate of New England Culinary Institute in Vermont, Robert Newton, the executive chef at Bar Julian at the Thompson Savannah in Georgia, first encountered grilled pizza when he was in college at Al Forno in Providence, Rhode Island.
“People I went to school with either interned or worked at Al Forno. They are pretty legendary for grilled pizza,” Newton tells InsideHook. “This was in the ’90s and Al Forno was a bigger restaurant then than it probably is now. Grilled pizza was just something people were aware of and talked about. I’ve made their dough many times and I always loved that it had a little cornmeal in it. Being a Southern boy from Arkansas and seeing a recipe from Rhode Island that had cornmeal in it somehow just made it feel more approachable to me. It has always stuck with me. I still have the little index card where I wrote the recipe down.”
After experimenting with grilling his own pizzas during culinary school, Newton continued to hone his skills anywhere he could find a grill, working as a private chef in locations like NYC, Santa Barbara and St. Bart’s.
“As we all know, people love cheese and warm bread coming off a grill with stuff slathered on it. So I spent a lot of time doing that in various iterations,” he says. “Grilled pizza is less chewy. You’re not going to have a soft spot in the middle like you would with a Neapolitan because of how the heat is directed. There are going to be spots that get very dark and some that get a little bit overcooked. That’s going to lead to a type of pizza you can break a piece off of. It’s not a cracker, but it’s cracker-like. And I don’t mean that in a negative way.”
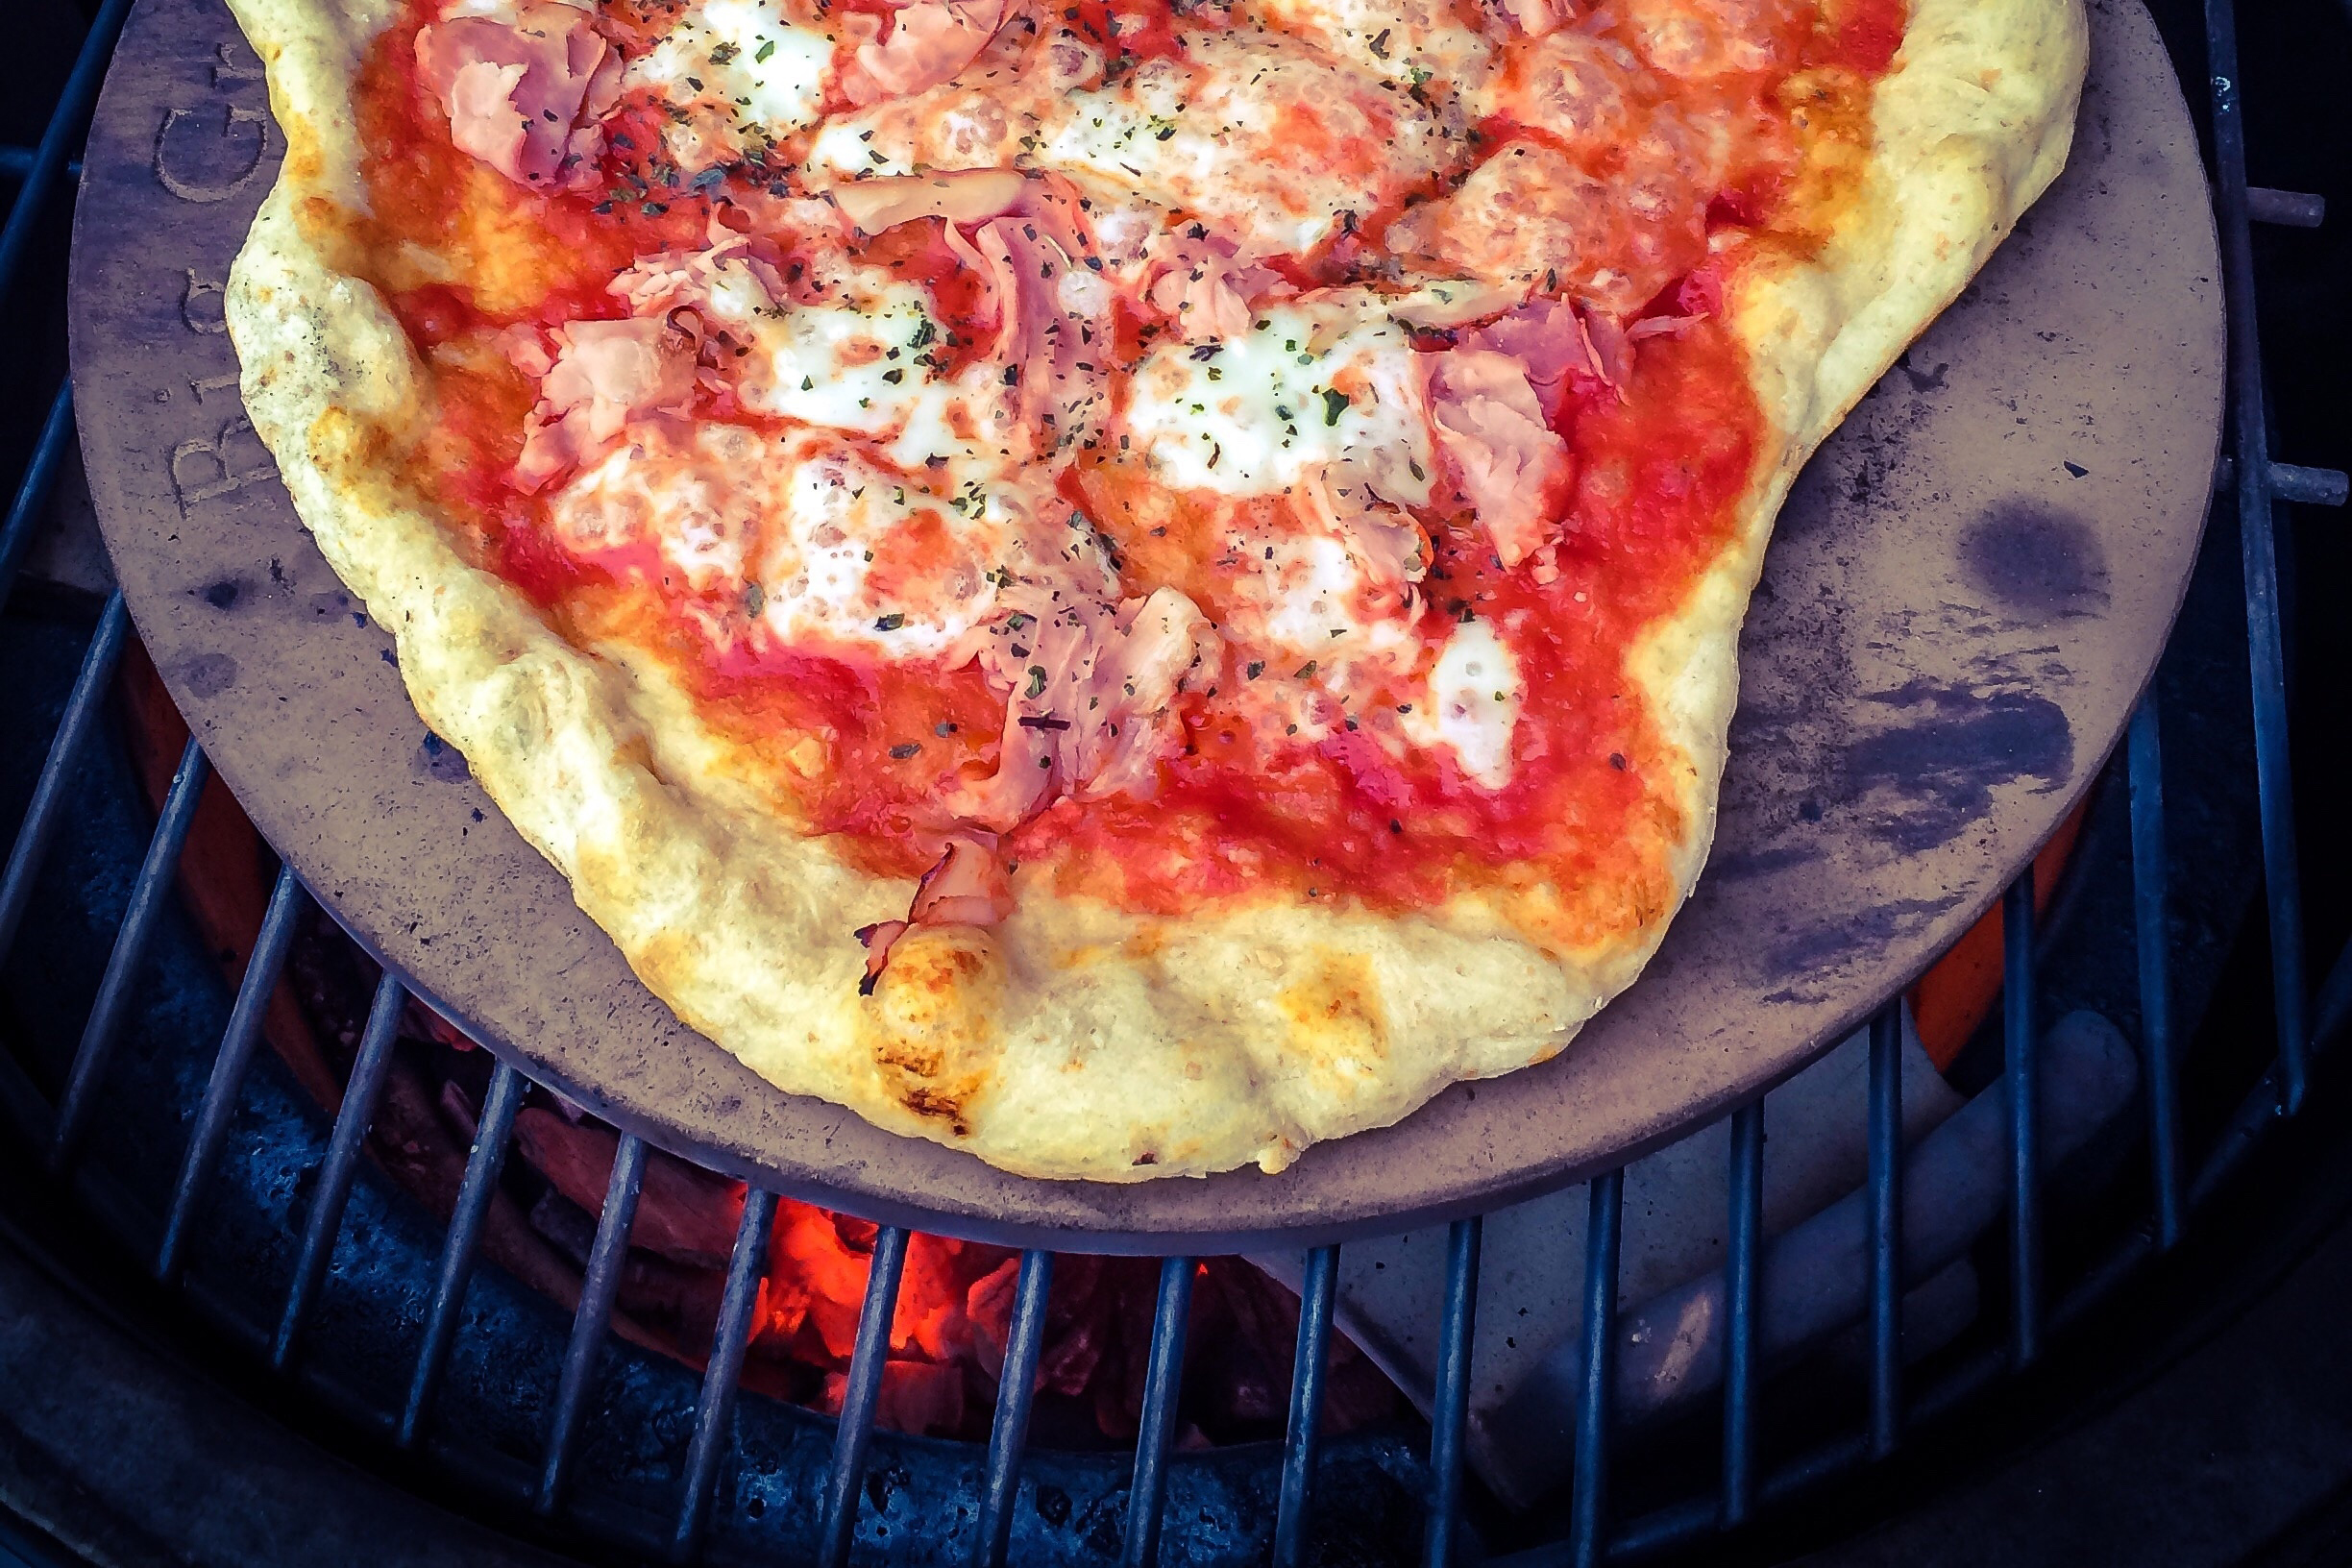
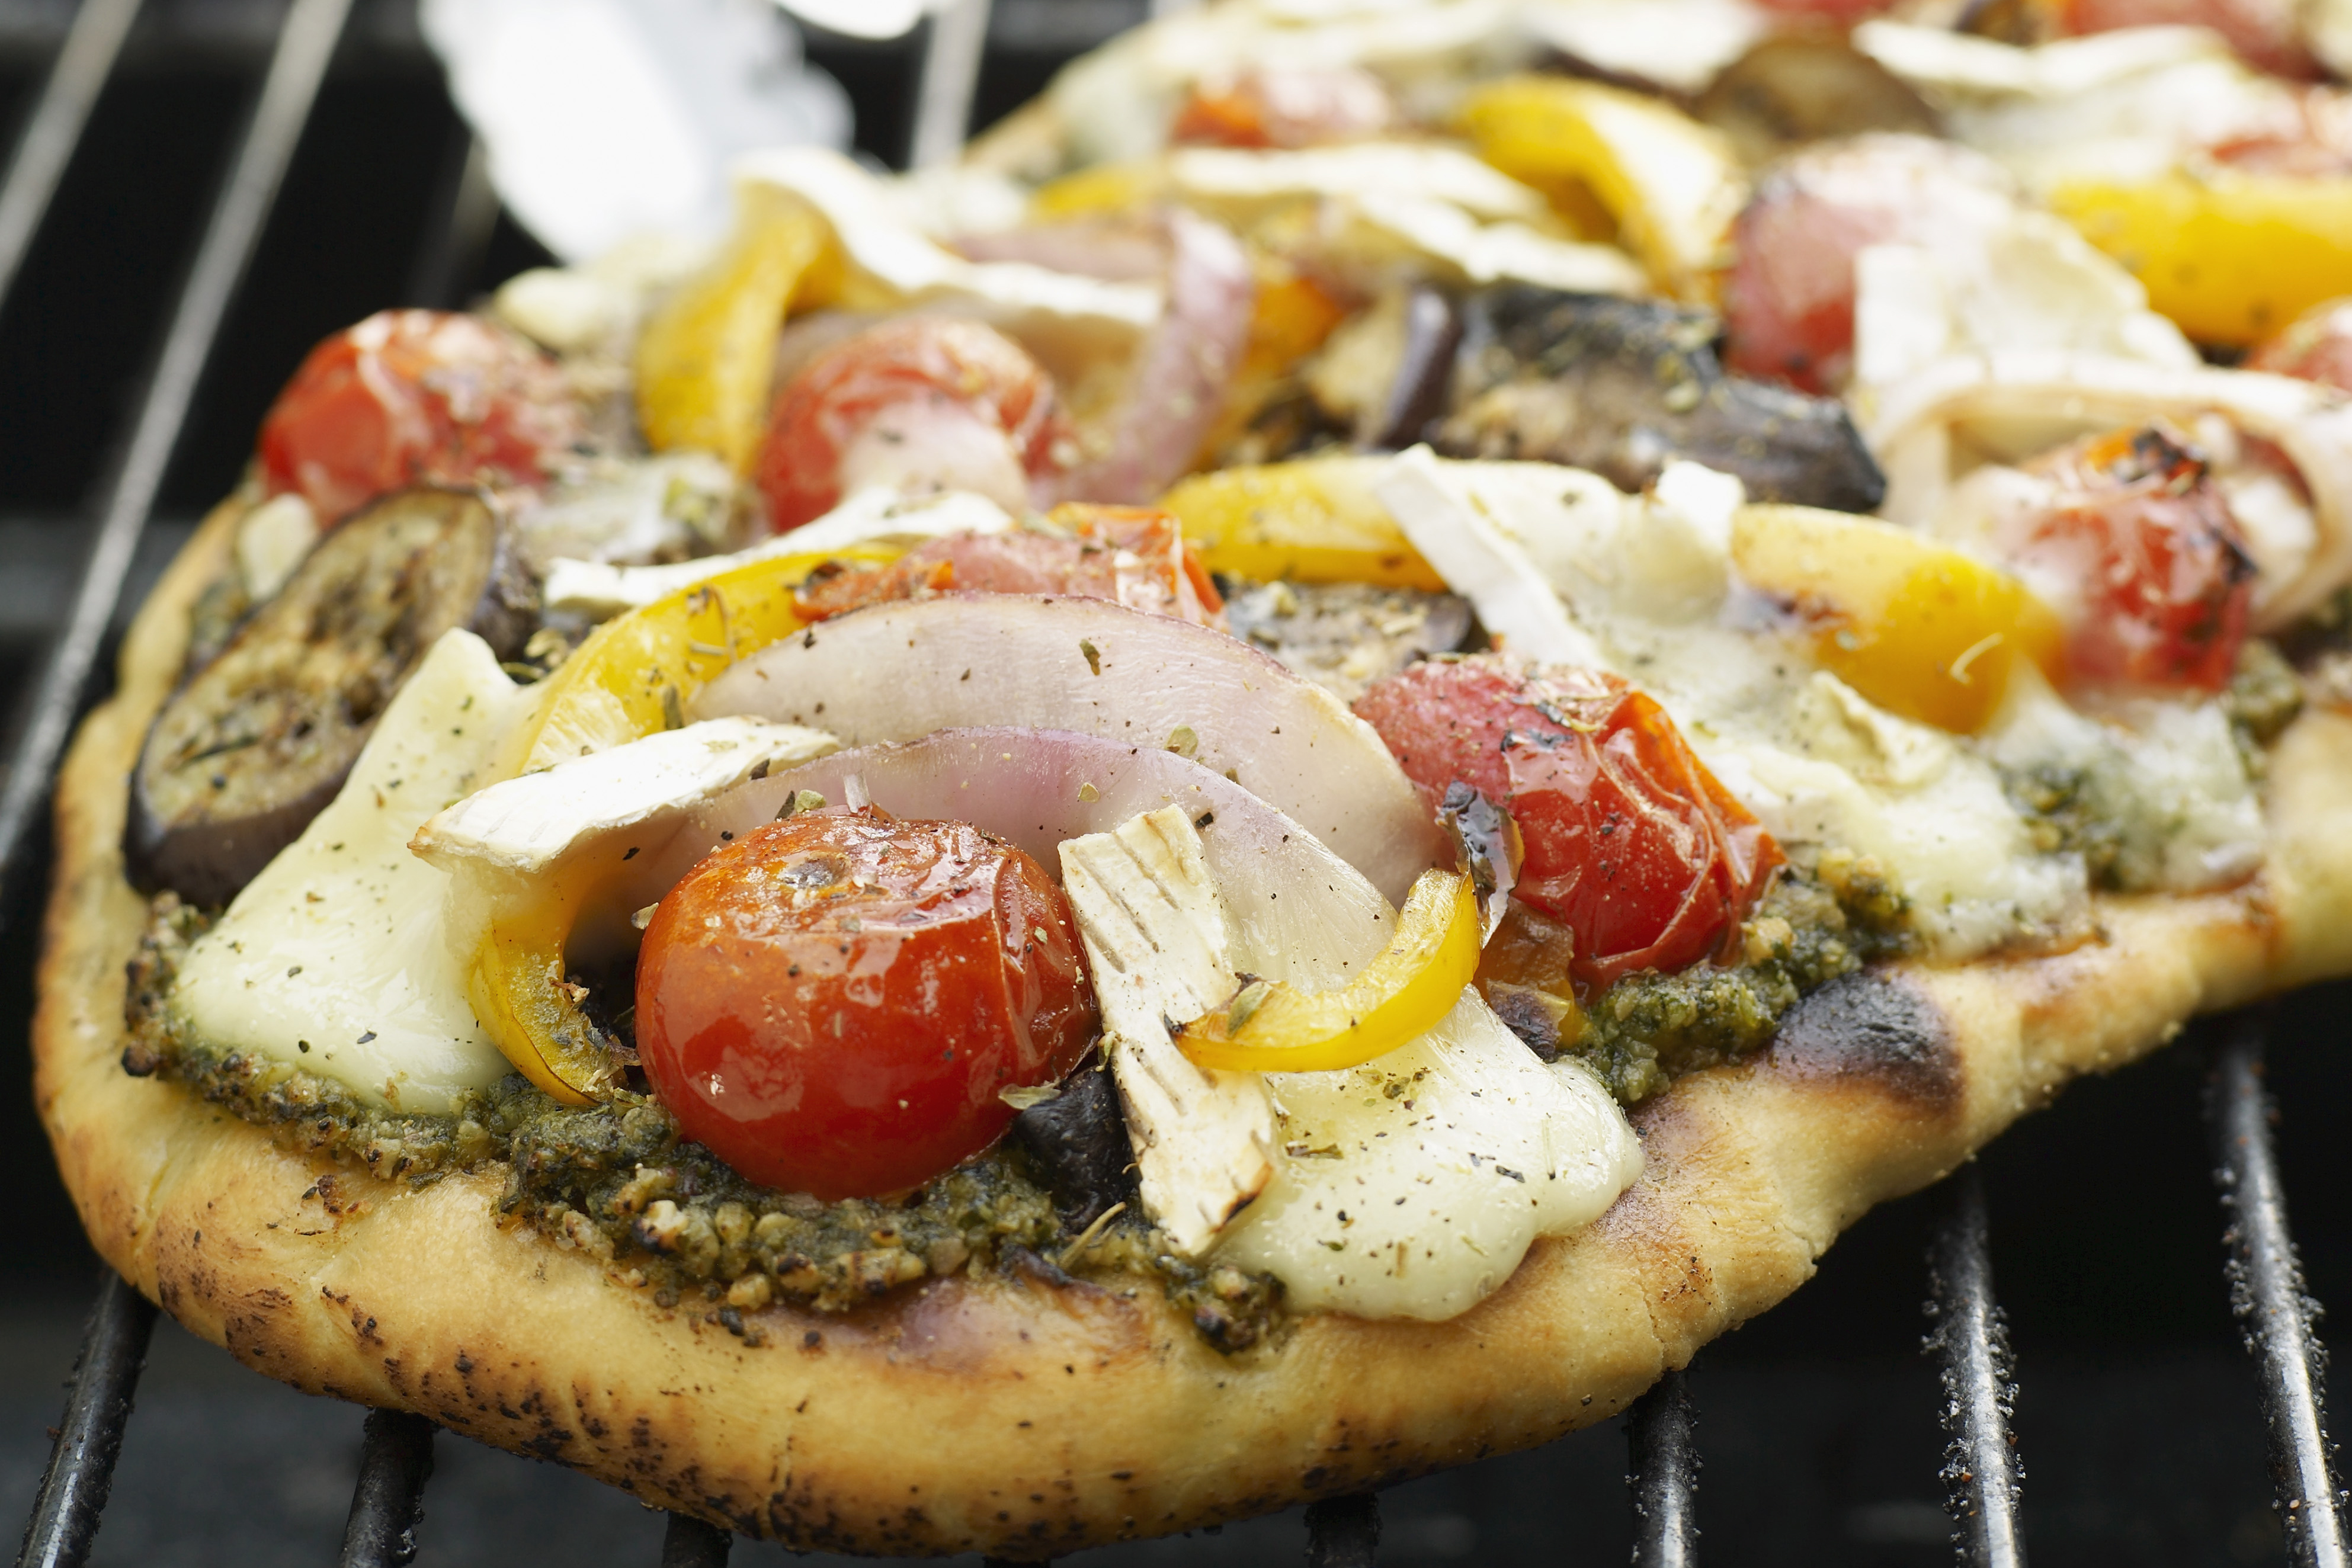
Below, courtesy of Newton, is a simple seven-step guide for getting grilled pizza right, including some helpful tips and his dough recipe of choice. For toppings, Newton suggests any and all of the following (but not all on one pie): tomato sauce and basil, ricotta, parmesan and olive oil, red pepper flakes, meatballs, gorgonzola and figs, gorgonzola and honey, country ham and arugula, goat cheese and salami, bacon and gruyère, fresh sliced peaches and ham, sliced tomatoes, cheddar and bacon, and pretty much any other leftover cured meats you happen to have on hand.

1. Determine Your Dough
“I recommend making the dough a day ahead of time and letting it sit in the fridge overnight. It really changes the concentration of flavor in your pizza game. Just get a little bit organized and let your fridge do the work. There’s a constant fermentation that happens overnight in the refrigerator. It will deepen the flavor and deepen the structure of your dough. I know everybody wants to make something and then cook it and be done with it. But it really, really helps out with the concentration and tang and gives it a deeper, more soulful flavor. Any place you like that takes pizza seriously is doing that at least for one day, if not two.” (See Newton’s dough recipe below.)
2. Select Your Sauce
“I am a no-cook sauce type of guy. That’s when you take really good tomatoes from the jar or the can and buzz them up with a little bit of salt, a little bit of olive oil and some oregano. It’s a raw sauce that essentially gets cooked while it’s on the pizza. Rao’s jarred sauce is nice if you are looking for a quick solution. It’s a little more like a Detroit-style cooked sauce. It’s cooked and going to have garlic and oregano and probably some chili flakes and a pretty high percentage of tomato paste. It’s just going to be richer and stronger. If somebody wants to go that route with a grilled pizza, I got no qualms about it. I am also all for tomato-free pizza. Dough and cheese to me is just a vehicle for just about anything.”
3. Choose Your Cheese
“I love burrata and buffalo mozzarella and all that, but this is not really the moment for that. If you open a package of burrata and put it on the grill, all the moisture is going to come running off of it and create a big mess. We don’t do grilled pizzas at Bar Julian, but we do a blend of cheese that’s 75% low-fat mozzarella and 25% Fontina. That melts really nice and it doesn’t get too oily. We started out with a 50-50 blend and invariably there would be little oil slicks that formed. Get a mozzarella blend at the grocery store and it’ll probably have Fontina in it. It won’t be like what we use, but it will be really close and it’ll be good. I would certainly stay away from anything that’s super wet.”
4. Grill Work Part 1
“The grill needs to be very clean. Scrub it down with a brush and then use a little bit of olive oil spray or a big towel soaked in oil to rub the grate. That’s pretty important. The grill should be hot, but not blazing at the maximum. If you have a hot grill and hot grates that are clean and lightly brushed with oil or spray, you’re not going to have a problem. When all those pieces are in place, I’ve never had one stick.
5. Grill Work Part 2
“Using a rolling pin to roll the dough out is okay here, but that’s a big no-no in traditional pizza circles (pun intended). Spray one side of your dough with olive oil. Take your dough as quickly and uniformly as you can and place it in an area that feels really clean, sprayed-side down. Then just leave it alone for a minute. People try to go at it too fast. The dough will release itself when it feels like it. The first caramelization is going to happen there. Watch closely. When it gets brown after about 30 seconds or so, you’re going to be able to pick it up with tongs or a spatula very easily. If you try to pick it up and it’s resistant, that means it’s most likely not ready to be released and it’s not done.”
6. Flip It and Flip It Good
“After the dough is released, evenly cooked and it’s not sticking, flip it with tongs or a spatula or both and let that bottom set. You’re really just trying to set the dough and get it so it’s not wobbly. Bubbles are going to start forming and the side you’re looking at is going to wind up being the bottom. You want that side to be a little bit flatter. Don’t cook it too far or let it go too much. It’s literally probably just 20 or 30 seconds. Then you want to take it off and put it on a cookie sheet or pizza peel so you can add your cheese, sauce and toppings.”
7. The Big Finish
“When you’re getting ready to top the pizza, brushing the whole top part with olive oil is a really good move. Brushing olive oil brushed into the dough while it’s still warm from the grill is going to set the stage for really delicious interaction with flavors. Also, when we top pizzas here, I like to be able to see a little bit of the dough under what I’m doing. That’s a pretty good rule of thumb, so I would probably err on the side of less is more. Also, because it’s a flatbread, there’s not going to be a perimeter on this pizza like there is on a traditional round pizza. Once you’ve added sauce, cheese and whatever else, it’s back on the grill for one final time in a cooler area and possibly even close the top. It could be as much as 30 or 40 seconds if you’re trying to melt cheese with the top down. It depends on what’s on there. If it’s a smear of ricotta and olive oil, 10 seconds is probably enough because you’re just warming something up. If it’s uncooked tomato sauce and the mozzarella blend, it will be a little bit longer to get that cheese to actually melt. The pizza is ready when the cheese is melted.”
Chef Rob Newton’s Pizza Dough
Ingredients
- 550 g all-purpose flour
- 290 g whole wheat flour
- 45 g cornmeal, finely ground
- 3 g active dry yeast
- 16 g kosher salt, preferably Diamond Crystal
- 525 ml water, body temperature or a little below
- Olive oil
Directions
- Combine everything except water in a stand mixer and mix with a dough hook for 30 seconds to combine.
- Turn off and add water. On low, mix for 2 minutes, then turn off and increase speed to medium and mix well for 3-4 more minutes or until dough pulls away from the bowl and is a complete ball of dough.
- Lightly oil a bowl and add the dough and allow to rest on the counter for at least six hours and up to 12. As mentioned above, refrigerate overnight for use the next day if you are really into it.
- Divide into four or five balls and they can be frozen at this point or cooked. To roll out, use a rolling pin.
More Like This


Join America's Fastest Growing Spirits Newsletter THE SPILL. Unlock all the reviews, recipes and revelry — and get 15% off award-winning La Tierra de Acre Mezcal.